Thursday, September 14, 2017

One Week Decluttering Challenge - The Minimal Lifestyle

September 14, 2017 1
I need to have a serious decluttering session and what better way to do it than a challenge! So here is my take on the "7 days" challenge - 7 days of decluttering to be a bit more closer to a minimalist lifestyle.
(If you know me personally, you know I need to do this challenge because my room is a complete disaster even after doing somewhat of a decluttering session)


NOTE TO READERS: This post was written when I was in India, hence the room I refer to is my bedroom back at home!


Today is Day 1 and as I'm writing this, I'm sitting on a chair, typing with my laptop on my desk. My desk is a complete mess. I recently posted my "How to declutter like a pro" article on this blog you can read it by clicking the link below:
I did follow my own guide. In fact, the guide was written off of my decluttering session. However, I noticed that the amount of decluttering I did, did not satisfy my goal. I avoided decluttering because I was bored of doing it those two days and I think I'm finally ready to do an actual massive declutter. I have to reduce all the items I own by a lot because I can't fit everything into my suitcase (I'm going back to the USA to attend university if you didn't know) and also because I don't want my dorm room to look cluttered and flooded with all the junk. I will take a picture right now of the current situation (a.k.a mess) in my bedroom.


Cringe-worthy, right? I agree! You would think I would be ahead of my game if I put up decluttering guides. Truth is, I'm not perfect and sometimes my laziness kicks in hard. I abandon a task completely and don't come back to it for ages. 

I'm going to conquer this 7 Day Challenge and I'm inspired by two reasons:
1 - I really need to narrow down what I am going to take with me and what has to either be passed on to my younger brother (like drawing tools and stuff like that) or thrown away/donated.
2 - I wouldn't want all this writing to go to waste because I bailed on Day 2. I like to be efficient and not completing this challenge would be the complete opposite of that.

Note that the "After" pictures may or may not look very different from the "Before" pictures above (I don't know yet because I'm literally writing this on Day 1). I'm assuming that there won't be a massive change because a lot of my things will either be kept so my brother can use them (e.g. art materials for his future school projects) or will be sentimental items that I can't take with me but I wouldn't want to throw them out. Some items will also still be present and not packed away into my suitcase because there's still time (a little more than a month) for me to go away so I won't pack everything just yet. Maybe I'll pack the things I know I definitely will not need till I get to my dorm room.

Here's my 5 Day schedule (you may skip to any particular day if you are more interested in that section of my room if you are looking forward to decluttering that same area in your room too):

Day 1: Mainly my nightstand and other small drawers/cabinets 
Day 2: Wardrobe part 1
Day 3: Wardrobe part 2
Day 4: Study desk part 1
Day 5: Study desk part 2
Day 6: Bookshelf (+ Laptop just for fun)

I tried to alternate heavy and light decluttering throughout the week so I don't get overwhelmed/exhausted/bored by the entire process to ensure I declutter thoroughly.

Let's begin!

Day 1: Nightstand

Before:
Since it's been a while since I did an intense cleaning up in my room, I think today I will start off with a small section of my room as you saw in the schedule above. My night stand is very small and I recently threw away a lot of old nail polishes when I was doing some light decluttering. However, I think I do need to revisit the situation and maybe make space for other items, that are on my desk, that don't belong there (like my lotions and sprays).

After:
So the session was pretty fast and I'm glad it was because I started at around 7 pm or 8 pm. Here's how much I threw away:


I ended up only decluttering my nightstand and not the other drawers so I think I'll just do those when I do my study desk. A lot of the stuff in my nightstand remained because my mom keeps nail polishes she uses in my nightstand too and there are also other things we both use that will probably stay there even after I move out. I'm still pretty happy with the progress and how much I threw out because it was way more than how much I threw out during my recent, failed attempt. I had some expired things, some items I hadn't used in ages and knew I wouldn't like some fake nail sets and adhesive stickers for the same. The problem I have when decluttering is trying to throw away items that have been gifted to me. I know that I won't use that item now but I also know that they've spent money on it. I feel guilty, but there's no use in keeping it because I 100% don't want it otherwise.

I also put all my art supplies from other cabinets into one cabinet (I will not be taking them with me but I have kept them for my younger brother).

Today was kind of like the trailer for this whole challenge and it hardly took any time. Tomorrow is the real deal. Decluttering my wardrobe and then my study desk is going to be a real challenge.

Day 2: Wardrobe Part 1

Before:
So as I'm writing this, it is already 5:40 pm and I'm afraid I won't have enough time to declutter my wardrobe thoroughly. The reason being, I also have to write a blog article and a few other tasks for the day. I'm pretty sure I can't film a YouTube video now (which was supposed to be today's priority).
Anyways, I'm gonna have some snacks and then get on with the decluttering.

My goals are to:
A) pack away clothes I won't wear till I get to the US (I know it isn't technically decluttering, but it's still organization and I also want to implement that into this challenge).
B) Separate my wardrobe into two sections: one for clothes I will give away just a few days before I leave and one for clothes I will wear now and also want to take with me.
C) Identify things I want to give away or discard right now like old accessories, etc
D) See a difference, personally, when I compare the before and after.

After:
I am pretty proud of today's work. I was able to successfully manage to do A, B, and D to some extent. I still have 2 compartments of my wardrobe to sort out, which I'll do tomorrow.
This is what has been removed, permanently from my wardrobe:


The bag doesn't seem too big even after using my phone as a reference but there are a lot of clothes packed into that bag. Plus, I had already removed and given away a lot of clothes a few months ago so imagine the picture above × 2 or maybe even × 2.5.
I had a lot of packaging and cardboard and all that from accessories and from socks, etc which I discarded. I just piled all my socks and then stuffed them into the corners of my suitcase (packing hack, by the way). I still kept a lot of my clothes for the sole reason that I may or may not have time to shop once I get to my campus and it'll take some time for me to settle in my dorm too. I don't want to have to stress over things like not having enough clothes on top of all the other things I'm going to be sorting out there.
My wardrobe definitely looks way emptier than it was before but I'm still a little concerned if everything will fit in two suitcases. I'm hoping that the rest of the days in this week will help me believe that I don't have way too much left after cleaning out everything.

Day 3: Wardrobe Part 2

Before:
Today my main goals are to accomplish yesterday's incomplete goals and my focus is the top shelf of my wardrobe (it contains accessories, makeup, maybe some toiletries, and some miscellaneous items). Again, a lot the stuff will stay in my wardrobe because I'll give most of my accessories to my mom and she doesn't have space in her wardrobe (lol) so it'll stay in my wardrobe.
If I finish decluttering my wardrobe early, I might (might!) do a bit of tomorrow's task.

After:
As expected, not much was taken out to be discarded since I decluttered about 80%-90% of my wardrobe yesterday itself. However, I did manage to remove more items than I expected to. I was basically expecting none of my jewellery/accessories to be discarded as my mom would use all of it but suprisingly I had a good amount of accessories discarded.

I let go of a lot of necklaces and earrings that I wouldn't have let go if my goal was not to make sure all my stuff fits into two suitcases so I'm glad I didn't keep anything for "sentimental purposes". Trust me when I say that before I kept everything for "sentimental purposes". Most of the time it wasn't even close to sentimental but I gave myself that excuse every single time.

Mission Nearly empty wardrobe: Completed
(just clothes I'll need for about a month's time and clothes I'll throw away just before going are kept)

Day 4: Study Desk Part 1

Before:
Those who notice that I've given myself two days for a desk and think that it is weird, kindly refer to the "disgusting ___" collage above. My desk has a lot of storage and is bigger than the average desk. I need two days. Okay...maybe I want two days, but whatever!

After:
I've successfully managed to distance myself from my art supplies (I love my art supplies and I'm a big time art supplies hoarder). Most of it has been kept, neatly, in the storage cabinet below my desk for my younger brother to use for school projects. I will only be taking a few paint brushes and perhaps one small watercolors set. I've thrown away some files that are old, a lot of miscellaneous items including things like old pens, rulers that were in unusable condition (don't ask how, I have no clue), etc.
I have filled my trashcan completely (to the point of overflowing). I have also gotten rid of a lot of the bottles that were lined up on that one shelf. Everything is so miscellaneous it's hard to describe what kind of stuff I threw out!

Day 5: Study Desk Part 2

After:
(I decided to skip the before part because there wasn't much to say)
There was a trunk-like case below my desk which was previously a case for the keyboard I have (we don't put it in the case anymore). It had a lot of art supplies, some random electronics I don't use, etc. I threw out 2 small boxes worth of stuff including an old microscope set I got when I was way younger (total scam, something was wrong with the microscope so it never worked properly), some decoration kits and so on. I also gave a lot away to my cousin who has come to visit me.

Day 6: Bookshelf

Before:
My bookshelf looks extremely messy and I have way too many files and notebooks in it. I hope to segregate the 4 sections of my bookshelf like this:
1 (Top shelf) - Files and notebooks I want to keep
2 - Dictionaries and notebooks for my brother + one or two pairs of heels
3 - Reading books (combined). I will decide which books I will take with me the last minute if there is any space in my suitcases.
4 (Bottom Cabinet) - Rest of my sandals/heels

After:
I was successful in doing exactly as I stated in my goals above and segregated my bookshelf according to that. I still have around 3 miscellaneous items that I am very confused about whether to keep or not. #Dilemma

I also have two camera bags in my bookshelf currently but that is again because there is nowhere else to keep it safe, I guess. My tripod will most likely reside in my wardrobe.

I threw away a lot of CDs (eBook versions of my high school textbooks), some vintage greeting cards with an unknown origin (why did I even consider keeping those in the first place?!), a lot of very old books and dictionaries, and two pair of sandals. I gave a pair of boots to my cousin because I had a total of two pairs of boots and I don't have enough space in my suitcases to fit too many shoes.

Overall, it felt pretty great to declutter my room and finally being able to actually see the furniture in my room for once. Unfortunately, I did this very last minute and just forgot to transfer all the pictures of my room from my camera to my USB drive once I was done decluttering and only realized now (after moving to USA). My camera is back at home and so I can't show you guys the wonderful room transformation that occurred after I finished decluttering it.
Hopefully, if my dorm room gets cluttered I can make a post when I declutter that! Just kidding, guys please do not hope that!


Monday, September 11, 2017

My Life is busy AF! - Update

September 11, 2017 0
Hi fellow readers!
I just wanted to make this quick post.
Turns out, balancing college, personal life, and a blog takes quite some effort and planning. I know I've been uploading quite randomly the last few weeks and it seems like I'm not focusing much on this site, but trust me when I say I'm trying to figure out how to manage everything in this new lifestyle. It's week 2 of college and I already have so many assignments but I am working on my time management and will try to become as regular as I was before with my blogging schedule. I have some awesome posts coming up on this website and I can't wait to brainstorm and create some new posts.
I am not taking a break from blogging even though my life is kind of a mess right now. I will still be uploading when I get time and hopefully can upload 3 times a week like I had planned.
Right now, I have to refer to the syllabuses and text book lists a million times because I can't remember anything, but once I get a hang of everything university-related, I can finally focus on this blog.
I have a few pre-written blog posts ready to be published, so for the next week or so I will be posting those along with some recent posts (like this one) depending on how much time I get to write new posts.
Don't forget to follow my socials and this blog! (Links and shizz are on the sidebar to the right!)

(P.S. if you are also a small blogger (or just a writer) and would like to collaborate or guest post on this website, email me at nihakalp@gmail.com !)

Sunday, September 10, 2017

College. For the first time.

September 10, 2017 0

So, it's happening. I'm going to college for the very first time. It's weird because as I'm writing this it still hasn't hit me even though that's what the first sentence could imply. I know it's happening but it hasn't hit me. Do you know what I mean? I thought by now I would have a million emotions and thoughts but nope. Nothing.

(A few days later...)

I haven't really gotten time to write or even think much in the last few days because my dad and I have been just running to Walmart and other places to buy essentials and chocolate, of course. I also got sick so have been sleeping a shit-ton (it sucks). Thankfully, I didn't get jet-lagged because I adjusted my sleeping schedule on the airplane. Life hack: If you are travelling to another country where the timezone is very different form your timezone, add the new timezone to your world clock and sleep according to the time at your destination country. Avoid getting jet-lagged!
I don't think I have a roommate because nobody has showed up yet and it is move-in day. I'm confused because my university's Resident Life emailed me saying that all single rooms were taken but apparently I have a single room now (?). I'm really happy I got a single because I love my own personal space and I don't have to meet another person halfway in terms of sleeping schedule and when I can play music, etc. I can also use the whole room!

My room is a mess. An absolute mess. The first two days after my dad left were occupied by the events the university had organized and it was mandatory to attend. It was exhausting and some of it boring too, but hey whatever. Since classes will be starting tomorrow I probably won't have time to clean up until the weekend.

(Next few days...)

I can't really judge how intense the classes are from day 1, especially because one of my classes got postponed to 31st October (4 of us weren't informed ahead of time for some reason, but it's cool).

All the first classes were about the professor introducing himself/herself and us introducing ourselves to the professor. Not much happened. The syllabuses for all the classes were handed out and it is quite different than what I'm used to. A levels were pretty straightforward and the only thing that the syllabus contained was what will be in the final exam. Here, it has so much information and is easy to forget. However, 5-10% of my grade is attendance - easy!

Turns out, reading assignments don't wait and I have a ton already. I've planned to finish the assignments a.s.a.p so I can develop a habit of doing my assignments before time throughout the semester and avoid wanting to re-post every semester-related memes:

Image result for semester memes

I'm also trying to get a part-time job on campus but I didn't realize that everyone would be desperate and would get all the jobs before I even remembered that I had to apply. There is one job that is still open (and where the fact that I'm not 18 yet doesn't cause a problem) so I'm really hoping that I can get that job.

I am one of those weird people who love studying (most of the time) so doing assignments early actually gives me great satisfaction. I hope my motivation can last and that I can overcome the laziness that resides in me. Thankfully, it hasn't crept in yet (knock on wood?).

I finished unpacking this week so I feel pretty good (except about the mess on the extra bed).

I don't feel nervous or scared or any such negative emotion. It is definitely a new situation but I don't feel completely aloof or like a complete stranger, if that makes any sense.

I definitely need to get my shit together and I know it seems like I'm saying this way too early but I don't mean it in that way. I want to get better at balancing everything in my life, not just college assignments. I want to be able to take out time for reading, and blogging (my blogging game hasn't been strong since I left India) and other hobbies/interests of mine even after attending college full time and a potential part time job in the future. I want to be able to manage my time very effectively and I think with a little more effort every day and with a good prioritizing system I can achieve that. I think I really want to learn to do that and that is my main goal for this "new beginning". Along with making a lot of money ($$$$). Just kidding, but not really though (someone fund my life for free, please).

If you want to know how to apply to college, check out these 2 blog posts linked below:

Wednesday, September 6, 2017

Step-by-step How to declutter your Phone and Computer like it's a cup of tea + Benefits

September 06, 2017 0

Once again, my digital art representations are a bit exaggerated, but moving on...

Benefits of decluttering your phone:

  • more storage space available (you won't be annoyed by the no storage space pop-up/notification)
  • You have enough space to download useful apps
  • You won't get annoying and repetitive notifications from the unnecessary apps after deleting them
  • You'll basically just feel better looking at an organized, decluttered phone instead of one with app icons all over the home page and a million photos and downloaded files everywhere.
Benefits of decluttering your laptop/PC:

  • Your desktop doesn't make you resent your own PC
  • You can easily find files/folders when they are organized
  • More space for softwares, files, etc. (especially if you were running out of space before decluttering)
  • If you work on your laptop, you actually feel like being productive when you see a clean and organized desktop and folders.
now let's get on to how you can declutter your devices...

PC/Laptop

I hate when my desktop has a million of icons even if they are in a grid format. It just looks messy and unclean.  I also don't like when my folders in my drives are messed up/disorganized. Because, after a point of keeping my PC clean, I tend to start saving files in random places to save time and there are a million folders and also a million files not in folders. This is how I declutter my laptop.


Step 1 | Remove the Unnecessary

In my case, I had a lot of files and projects from when I was in younger grades. I've always loved using laptops and spent a lot of time making or downloading stuff. I always kept the files for later use but never actually used anything.
These files were already backed up in an old external hard drive with a lot of other stuff (my dad's stuff) so I deleted all of those files from my laptop. In fact, after a year or so I even told my dad to delete those files from his external hard drive because I really was never going to even open the folders.

Before I used Pinterest (a long time ago), I used to save Tumblr-y images to my laptop. Deleted those too.

Find those files that you haven't touched, nor will in the future, and delete them. Chances are, your laptop hasn't been around for so long that you have projects from when you were 9 or 10 (if you used a laptop back then) so most of the old files probably don't mean too much.

Delete recent files you no longer need like an e-book that you have already read, or files for a project you have already finished and submitted. Delete downloaded apps you no longer use. Clear up all that storage space.

If you haven't deleted anything remotely-important recently, permanently delete all the files and folders in your recycling bin. If you have deleted something that you aren't sure if you will need to restore or not (e.g. files for a finished project that isn't backed up) and you don't have too many files in your recycling bin, you can select all files except the important ones and delete them for the time being.

Delete any desktop shortcuts you don't use, random downloaded files that aren't relevant anymore, etc.


Step 2 | Organize

First of all, if you are using a laptop that is sometimes used by someone else or if you share it with someone else, create a folder for you (you can basically just make a folder with your name). Next add all the remaining files after the deletions into that folder, even the files on your desktop (leaving the shortcut icons you need and "My computer", "Recycling Bin", etc). This will clear up your desktop. If you really need some of the files on your desktop only, try to create only one or two folders and those files in there.

Inside your personal folder, create folders to segregate the categories of folders you have. If you use your laptop for work and personal use, first create two folders separating those. Creating categories will help you to remember and be able to easily locate the file when you need it.

Try creating sub-folders in your folder if you have too many folders and can group a few into one category.


Step 3 | In the clouds

What I have started doing recently is making Spreadsheets, Documents, etc. on Google Docs. Not only does that save a little (negligible almost, but still) space on my laptop, but also I don't have to worry about losing my files if something happens to my laptop.

If you have any pictures, media, etc that you don't need that much but still want to keep them, you can upload them to any cloud you use and delete them from your laptop. It can be like the basement of your house - not the most important part of your storage but still has a lot of files in it.


Smart phone

My phone always told me that my storage space was running low or that I had to delete one or two apps to be able to download the one I was trying to at that moment. I could never find the meme or picture I wanted to in time because it was drowned in an ocean of other pictures. I had so many downloaded files I didn't need. Decluttering your phone is very similar to decluttering your laptop/PC. 


Step 1 | Remove the Unnecessary

This is pretty self-explanatory at this point. Just delete apps you don't use, delete memes you have been laughing at for ages and delete random pictures or those pictures your phone took on its own when you unlocked it by mistake. Delete pictures that carry no significance either due to the amount of time the pictures have spent in your phone or because they never were important in the first place. Delete the PDFs you don't need anymore and the random notes and files and memos and all those screenshots of conversations you sent to your friend(s). You get the point.


Step 2 | Transferring and cache-clearing

Transfer anything and everything you can to your SD card. Phone storage is used up because of software updates and all those important phone files that you can't delete. So go into your settings, go to application manager, and transfer all the apps you can to your SD card. This will free up a lot of your storage especially if you are transferring large applications like Instagram, Facebook, etc.
Another thing you should do once in a while is delete cache. Large and frequently used applications usually have a lot of cache. You can delete all the cache in one go by going into your phone settings and then to "Storage". You could download an app to clear your cache in just one click, but chances are that app takes up quite some space in your storage, defeating the purpose of trying to clear your storage for other stuff.

Note: You may be tempted to also clear the "miscellaneous files" after you clear you cache. But be careful. If you delete files in the "miscellaneous files" like the Whatsapp folder, for example, you will end up deleting all the media you have received from people on Whatsapp. You don't want that unless you know 100% there is nothing important your friends/family/acquaintances/whatever have sent you. I suggest going to your gallery/files and selecting pictures and deleting them. It'll take longer, but you won't risk deleting important pictures/media.


Step 3 | In the clouds

Just like above (in the PC section of this article), you can store pictures, PDFs, etc, on a cloud app and free up some space on your phone. This is also great to do if you need to access your files from another laptop/device as you can just log in to your cloud software/online cloud website and access the files.


Step 4 | The final touches

To wrap it all up, only keep very frequently used apps on your home screen and/or make folders to make it look less crowded. If you have an iPhone you don't have a home screen but you can still organize your apps in to folders. If you have an android phone, reduce the number of pages after your home screen. You could keep a page with a calendar widget and maybe one more page but don't have too many pages if you want to keep it minimal.

Sunday, September 3, 2017

5 Years of Acne - My Acne Story

September 03, 2017 1

I've had oily skin and acne since as long as I can remember. At first, I didn't really notice the bumps on my forehead till my teachers and classmates started pointing it out. I didn't really have anyone tell me to not touch it so I didn't think it would do any harm. So I did touch my forehead a lot and try to "extract" the small bumps on my forehead. I was lucky enough to have it only on my forehead...but not for long. The acne became worse, red, weird.

I didn't do anything about it because I thought it would just go away after a few months or a year because it was probably hormonal. I was around 12 years old at this time. 

But it didn't go away after a few months or even a year. It just became worse and worse and worse. It eventually spread to my cheeks and jawline. The acne basically took over my entire face.

I was very bothered by my acne. People kept asking me what happened to my face as if I intentionally covered my face in the dirt to spawn these little devils on my face. 

At this point, I kind of got used to touching my face and it didn't help my situation at all. I had acne and acne marks/spots all over my face. It became worse when I was stressed (for example, during exams) because I touched my face, even more, when I was. People immediately noticed when my acne flared up. That wasn't the problem, though. They told me. That was the worst. Friendly tip if you have a friend or know someone with acne: Don't tell them, they already know!

Everyone has a mirror, and those who have acne probably already look in the mirror a lot of times during the day hoping for their acne to go away or getting stressed out about new acne.
All you are going to do by telling someone that their acne looks worse from the last time you saw them is make them not want to talk to you and reduce their self-esteem. In my case, it didn't matter when my close friends pointed it out (I guess because we already insulted each other for fun so this didn't have an effect). There's a difference between a concern and an unnecessary comment that doesn't actually help. 

People also just assumed a lot. They assumed that I didn't take care of my skin. I understand a lot of people don't realize that they aren't taking enough care of their skin despite having acne, but that was not my case. I literally tried every facewash and cleanser there was for acne-prone/oily skin. I tried to stop touching my skin for at least a few days (before giving in and then trying again) but it obviously didn't work. People also assumed that I was getting acne because I was angry (????). I get it, I was a teenager and I was moody (however, people assumed that even if they didn't know me well) but honestly how do you expect me to manifest a face full of acne because of my teenage tantrums?! It was ridiculous.

I had severe (but not that severe. I was lucky enough to not have very red, large acne. It was spots and small acne which is still bad but I'm grateful it wasn't worse) acne for a good few years and it made me frustrated and anxious. Sometimes, I didn't want to go out because of everyone pointing out what was obviously visible to me. What frustrated me further was that no matter how many times I cleansed/washed my face, there wasn't even the slightest improvement.

At this point, I started developing "bacne" (back acne) and it also spread to near my collarbones and shoulders. I tried back polishing and face clean-ups too, but all in vain. What I thought was just a temporary hormonal imbalance that would go away on it's on in a year or so stayed with me for a lot longer.

In 2016, I went through a very tough time that I've told only a few people about. The entire year was bad for me and it was the lowest point of my life thus far. The fact that I had my face to worry about didn't help with my newly-developed anxiety and it just became worse. When I pulled myself out of this phase in my life, I decided I didn't want my face to have even 1% control over my day/mood and I started by strictly not touching my face at all and continuing the search for a face wash that did help my face even in the slightest way possible. Today, I am so grateful to have almost no acne spots on my face and rarely occuring acne. My skin is still oily, and my hormones are still changing - those two factors are something I cannot do much about. But, the degree to which my skin has improved is so amazing and I am so happy even though my skin isn't 100% perfect. Honestly, after having so many years of acne, this is like the best deal. Of course, I will continue to try and improve my skin quality and there is work to do still. The healing process is a plateau graph; steep increase at first and then steady.

Most people will only give you the following two pointers as "advice":

↣ Wash your face twice a day
↣ Don't touch your face and don't pick at the acne

But the truth is, that isn't enough for everyone. I was made to think that it was my fault that the acne got so "out of control" and that it was my fault because I didn't take care of my skin. That was simply untrue. And if you are dealing with acne right now that will not go away for the love of god, click the link below to see how I finally got rid of my acne!

If you want to know what my regimen/routine is currently to keep my face clear, head on over to this post:

Monday, August 28, 2017

NEW CHAPTER

August 28, 2017 2
My life is about to change drastically as I'm moving to another side of the world and I thought I should address this closing chapter and the new chapter I'm about to open.

new life chapter

Ending this chapter...

/ / R E L A T I O N S H I P S / /

The past two years I've had so many relationships change; some for better and some for worse. I am so grateful for both of those types of changes.

Some relationships became stronger and I'm so grateful for those people in my life and it makes me happy to know that I have people who care about me and are excited when I am and sad when I am. I hope I'm doing the same for them and I hope I'm being a good friend to those who are being one to me.

For the relationships that have changed for the worse, or maybe become less significant or less important to me, all I have to say is thank you for the experience. It seemed bad at the time and it took up so much of my energy but I'm glad I went through that because it has changed me so much too. I have learned to listen better and to see through a person better and I've learned to be more patient and mature about tough situations.

The following may seem like I'm almost outing everyone like a mini version of 13 reasons why but I assure you that's not it. I am over being negative and all that and truly want to begin my "new chapter" by closing the previous one with a good note. The people I mention below is not because I will cut them out of my life once my new chapter begins. In fact, it is the complete opposite for most people and I hope to have them in my next chapter because I don't want to begin it alone...

/ / P E O P L E / /

Person 1
You are my best-est friend in the entire world and I love you so much. You know everything about me and you know me so well that you can even make me smile when I'm mad and don't feel like smiling. I give you a tough time all the time but despite all of my mood swings and irrational behavior, you still stick next to me and I am just so grateful for you. You go out of your way to do things for me and I hope you know how appreciative I am.

Person 2
We don't talk as much but we're still close in the weirdest way possible. We won't talk for weeks at a time but there are no hard feelings because we understand that we both are busy. You know a lot about me that I haven't told to anyone else and I always feel safe talking to you. We have weird conversations during the night because apparently after 12 am both of our brains decide to have no filter and let the weird topics loose. But hey, the conversation is still fun! I hope we stay in touch forever, which means we keep messaging each other once every few weeks at least :P

Person 3
Our friendship started weird and there was this entire dramatic situation that occurred but I guess we patched up after that. Our relationship just went up till there and I genuinely think that it was going great from both sides for a very long time. "People change". I never believed when people said that. I always wondered how it could be possible for someone to change so much that it would be hard to even connect their present self with their past self. I guess I was just naive because I found out it was very true in a not-so-pleasant way. I don't have any hard feelings because I am so over the whole ordeal and a part of me will still love you...or the idea of loving you. We can't always mend what is broken and I am not trying to anymore. We're still good friends and I enjoy time spent with you.

Person 4
You are lame and not at all creepy (if you are reading this, I think I just made it obvious that this is about you) and honestly, I don't even know why I still talk to you :P. Okay, enough with the insulting. You're definitely a weirdo (in a good way) and I enjoy talking to you. I must admit, I zone out through your "drunk stories" sometimes, but otherwise, I'm glad I reconnected with you (we never really talked before, but you get it). You're a fun person and it cracks me up when I see how many "being single" memes you have sent me throughout this entire year or so that we've known each other.

/ / J O Y / /

So many wonderful things have happened to me. I have people around me with great energy who motivate me to be a better person and work on my flaws. I am not under the illusion that I am perfect. I'm not even near perfect, but the people around me are helping me get closer to the person I want to be and I'm thankful for them. I got to foster a puppy for 2 weeks this year. It was the best 2 weeks of my life. The little fluff ball taught me stuff in 2 weeks that I couldn't learn in 17 years and it was such a learning experience and so much more space was created in my heart for love. I am so glad she got a permanent home and I am so grateful for being able to take care of such a sweetheart (even though she bit me a million times because she was teething!).
It was nice being genuinely happy due to so many events for so many moments, compared to last year. 

/ / P E R S O N A L  C H A N G E / /

Recently, I went a bit downhill again. A little bit anger came back, more of the mood swings, a little bit more anxiety. But I think it's okay taking three steps ahead and one step back. That's life. You can't expect to have no obstacles or no setbacks. I'm only human and I'm working on becoming a better person in general. I think the main things I'm trying to learn is patience, being calm in stressful situations, and listening to the other person and trying to understand the situation from their point f view instead of immediately reacting in a regretful way. I hope the next chapter in my life helps me grow in other ways too. I assume being independent will definitely teach me a thing or two.

Starting a new chapter...

/ / P R E S E R V A T I O N / /

I hope to preserve the good relationships I have right now. I don't want to lose any of those who I am close with because the thought of that is scary to me. I hope I don't change in a way that will drive them away from me but I also hope I change for the better because I know I can't avoid change. It will happen. People grow and people change. I just hope I change into a better version of me so that I can love myself more and so people I love can continue loving me too.

/ / N O U V E A U  / /

I want to make some solid relationships with people I meet in the future. I want to attract truthful and genuine people in this new chapter of my life and want to make new memories that make me happy. I don't have any idea what this new chapter has for me and the number of uncertainties is terrifying but I am waiting for what is in store for me. 

I am turning the page and entering this new chapter with a positive mindset and hopeful heart. 

Saturday, August 26, 2017

How to effectively plan out and create a complete blog post + how to write more - Blogging 101

August 26, 2017 3
I like to be very organized in planning my blog posts and I like to write more to make sure my tutorials or life hacks that I'm sharing are well explained and detailed. Here's how I plan out my blog posts and get inspired to write more for each post:

how to effectively plan a blog post
Disclaimer: This post is not sponsored.


FREE PRINTABLES AT THE BOTTOM OF THIS POST!

Planning blog posts aren't just writing a few words and clicking Publish (unless that's what your blog is, go ahead). You could just post pictures on your blog, but if you want to profit from and have traffic to your blog, only pictures probably won't do the job (unless you are super lucky).

Recently, I have been writing posts every day to stock up for this and the following hectic months so that I can spend more time with my family before I head off to the USA for university. Writing and coming up with a lot of blog ideas can create quite a mess and being organized is definitely the key for not going completely insane, if you too are writing blog posts every day, or more than 3 times a week.

1 Penning it down
I like to start off by making a list of new ideas and variation for a certain topic. When I have ideas for the body of the post I will quickly write them down under the title idea as a sub heading because I will most likely forget that point. If I do not think of a particularly good and important point, I will just continue with listing the ideas.

2 Expansion
The next step in planning out a blog post is expanding the topic into categories. I may start off by listing points I would like to include under the title written on a random page of an old planner or I may skip that step if I have time and create a flow chart or spider diagram to expand the topic. You will see ahead, a flow chart showing all the steps in making a blog post ready to be published below (like a summary of this post)

Once I expand the idea and create categories, I will begin writing my blog post. I start with an introduction as you can see in this post and on basically every recent post of mine. Once I type down the introduction, I evaluate it to see if it would make a good meta description. If you don't know what meta description is, it is basically the text you see below the title of the google suggestions when you carry out a search. Consciously or unconsciously, you read that description to know if the site really contains the information you are looking for. If you are using blogger, the only option to create a good meta description is by adding the relevant information in the first two sentences. If you are using Wordpress, there is a plug-in you can install to type down, separately, the meta description. If my introduction doesn't contain, in my opinion, a satisfying meta description, I add two more lines above it that perhaps would be a better description.

In the body of my blog posts, I write down the key points/categories and then continue to write under each of the headings.

3 Pictures & Links
I like to add pictures and links, when applicable, to my blog posts. In my opinion, images help make the post look more interesting rather than bland and "too many words". It adds a bit of color and doesn't keep the entire page from looking plain. I also add links to any relevant blog posts that I think you would like to read. For example, since you are probably a blogger or thinking about creating a blog (otherwise you wouldn't be reading this), you may want to click on the links and read the posts below:

I also like to add a picture at or near the beginning of the post to tell you, in a visual format, what the post is about. It is kind of like the thumbnail of the post. I usually use PicMonkey or iPiccy to edit and add text to this thumbnail. If I don't have a photo that I have taken to go with the blog post (I try to use one of my own photos when possible), I will head on over to Unsplash to get amazing quality pictures for free!


(Don't forget to add Title and Alt Title to your pictures)

If I have to link to a video or post that is not yet posted/created, I will type [VIDEO] or [LINK] and highlight it like shown, so that I don't miss it when I'm going through my post one final time before publishing incase I forgot to link the post/video.

4 Labels
Adding labels and adding the right labels can make a difference to your blog. Especially if you are a small blog, you may see a slight increase in your traffic when you start using the right labels. I use the Serps Keyword Research Tool to see what are the most used labels and which labels have the highest CPC.

5 Finishing touches and publishing
I add some finishing touches, like a change in the font style or spacing between paragraphs, etc. Next, I publish the post and promote the hell out of it on Instagram and sometimes Facebook (sorry not sorry for the spam).

6 Other Things I Do
I like to keep all my blog ideas typed into Google Sheets so I can make sure that I don't forget to link to other important blog posts and can keep track of how many posts I have ready for publishing and what posts I have to write next.

I like to use Draw.io to make my flowcharts and here's a flowchart to summarize this blog post
(but read below to know how I manage to write at least 1000 words per blog post):


I try to write at least 1000 to 2000 words per blog post. Mostly, I am not able to write 2000 words and sometimes I even fall short by a few words. Writing more words can increase your Google ranking and the more you write, the clearer of an idea Google will get what your post is about.

There are two methods I use to write more words:

  • I copy my entire blog post draft and use a word processing software like Microsoft Word to paste all part of the draft and see how many words there are in total. I proceed to try and add more if the word count isn't sufficient
  • Doing the same thing above, but first, I see how many words the introduction is. Then, I see how many categories/steps/subtitles the post has and calculate how many words on average should be written for each category. I then try to fulfill that average.
FREE PRINTABLES!
I created a basic printable so that you can easily plan your blog posts!
You can either right-click on the below image and click "save image as" or you can go to this Google Drive link and download the pdf version of the same printable (the second option would be easier for you to print). If you want me to email you the pdf file (in case you don't use google drive), then DM me on Instagram: @blackandwhiteandwise
If you download the printable, let me know in the comments or on Instagram if the printable was helpful!

Link: https://drive.google.com/file/d/0ByYzoYNWNnsDVHNWRFJLeHdYczA/view?usp=sharing
blog organization printable

Thursday, August 24, 2017

The Best Skin Care Routine for Acne Prone Skin - Ultimate Guide

August 24, 2017 106
Here's my skincare routine that I live by for keeping my skin oil-free, and most importantly, acne-free. I had acne for around 4 to 5 years and finally got rid of it. I will have at least two more posts related to this topic; one about my acne story and the other of how exactly I got rid of my acne (the routine below helped a lot but there were other factors that played a major role). So stay tuned to read the other posts. Follow my blog (you can click on the follow button to the right. It is under my Pinterest board "My Aesthetic") so that you know when I post.

So without further ado, I will tell you what I do to maintain my face and acne-prone areas on my body.

the best skin care routine for acne-prone skin

This is NOT a sponsored post


1 
Clean your face/acne-prone areas on your body (Twice per day)

Use face washes that are for oily/combination skin types. It is very important to use the right kind of face wash and if your skin is sensitive then make sure to use a mild formula face wash. Two chemicals you should look for in any soap/face wash you use are Salicylic Acid and Benzoyl Peroxide. Salicylic acid basically works by dissolving the skin debris that clogs pores. Salicylic acid can regulate skin cells. Products with salicylic acid are best for white heads and black heads. Benzoyl peroxide unclogs skin pores and prevents bacterial growth. Hence, this is great for cystic acne. 

I used a cleanser with salicylic acid. However, it didn't reduce my acne. If you read my post on how I got rid of my severe acne, you will know that my acne was mainly hormonal. Hence, the cleanser did keep my face clean and possibly prevented acne caused directly due to clogged pores, it didn't have much effect on most of my acne (hormonal acne still is due to clogged pores but the salicylic acid obviously doesn't work on hormones).

My dermatologist prescribed me a face wash that I still live by and it did wonders for my bacne (a.k.a back acne) and my face as well. It helped reduce my acne (with the help of my oral medications too). The most obvious effect, however, was the rapid reduction of my acne marks on my back and on my face. The face wash is called "MDELIC Face Wash" and you will probably only be able to buy it if you live in India. BUT, it contains Mandelic Acid. This chemical is known for helping with acne, wrinkles and a few other skin problems. You don't have to buy an expensive serum or anything like that which contains mandelic acid. All you should do is buy a face wash that has mandelic acid as its main ingredient (i.e it should be at the top of the list of the ingredients). Other ingredients like Vitamin E and Aloe Vera are also beneficial. 
facewash with mandelic acid

You should wash your face 2 times a day. If you wash your face more than 2 times a day, you may end up drying up your skin. 

2 
Moisturize (After you wash your face)

Now you have to be very careful when selecting a moisturizer. Any oil-based moisturizer is a big no-no. The best option is to get a gel, water-based moisturizer. There are a lot of those out there, I use one called "Sebaoff". I'm not sure if this moisturizer is available everywhere but don't sweat it if you can't find the exact one. There are a lot of 100% oil free moisturizers. You could even try the Clean & Clear Oil Free Moisturizer.

3 
Sun Protection (Every day)

The Sun gives you Vitamin D, but it can also give you more acne. "Sun can clear skin" is a complete myth. When your skin tans due to the sun, an illusion is caused by the skin around the acne darkening so the acne doesn't stand out as much. But, if you think the sun cannot harm you, you are mistaken. The sun can cause breakouts if you have acne-prone skin. You should always apply sunscreen with UVA and UVB protection. Use a matte gel sunscreen. I use the oil-free sunscreen range from Lotus Herbals but it doesn't really matter if it protects your skin and is oil-free. I also use a sunscreen prescribed by my dermatologist that contains aloe vera extracts (as you can tell, aloe vera is pretty famous in helping your skin).
sun screen for acne prone skin


4 
Topical Ointment (According to prescription or once a day)

This, for those who don't know, is basically just a cream to apply to places where you have acne. However, this should be used when prescribed by your dermatologist. If it is a cream that is found in any general store, you could take your chances, however, a dermatologist can probably suggest a better one that will target your exact type of acne.


5 
Put in a little bit more effort to help your skin

Face packs and face exfoliating scrubs are a good way to help your pores and remove excess debris from your face. Applying a face pack or using a scrub once or twice a week will help your skin and give you a natural glow. You can buy face packs or face masks or you can make your own at home! (Homemade face packs won't have unnecessary preservatives and chemicals)
wine and beer facial scrub

Before applying your face pack, make sure to wash your face and here's a little extra beauty tip you can use a few minutes before you apply your face pack:

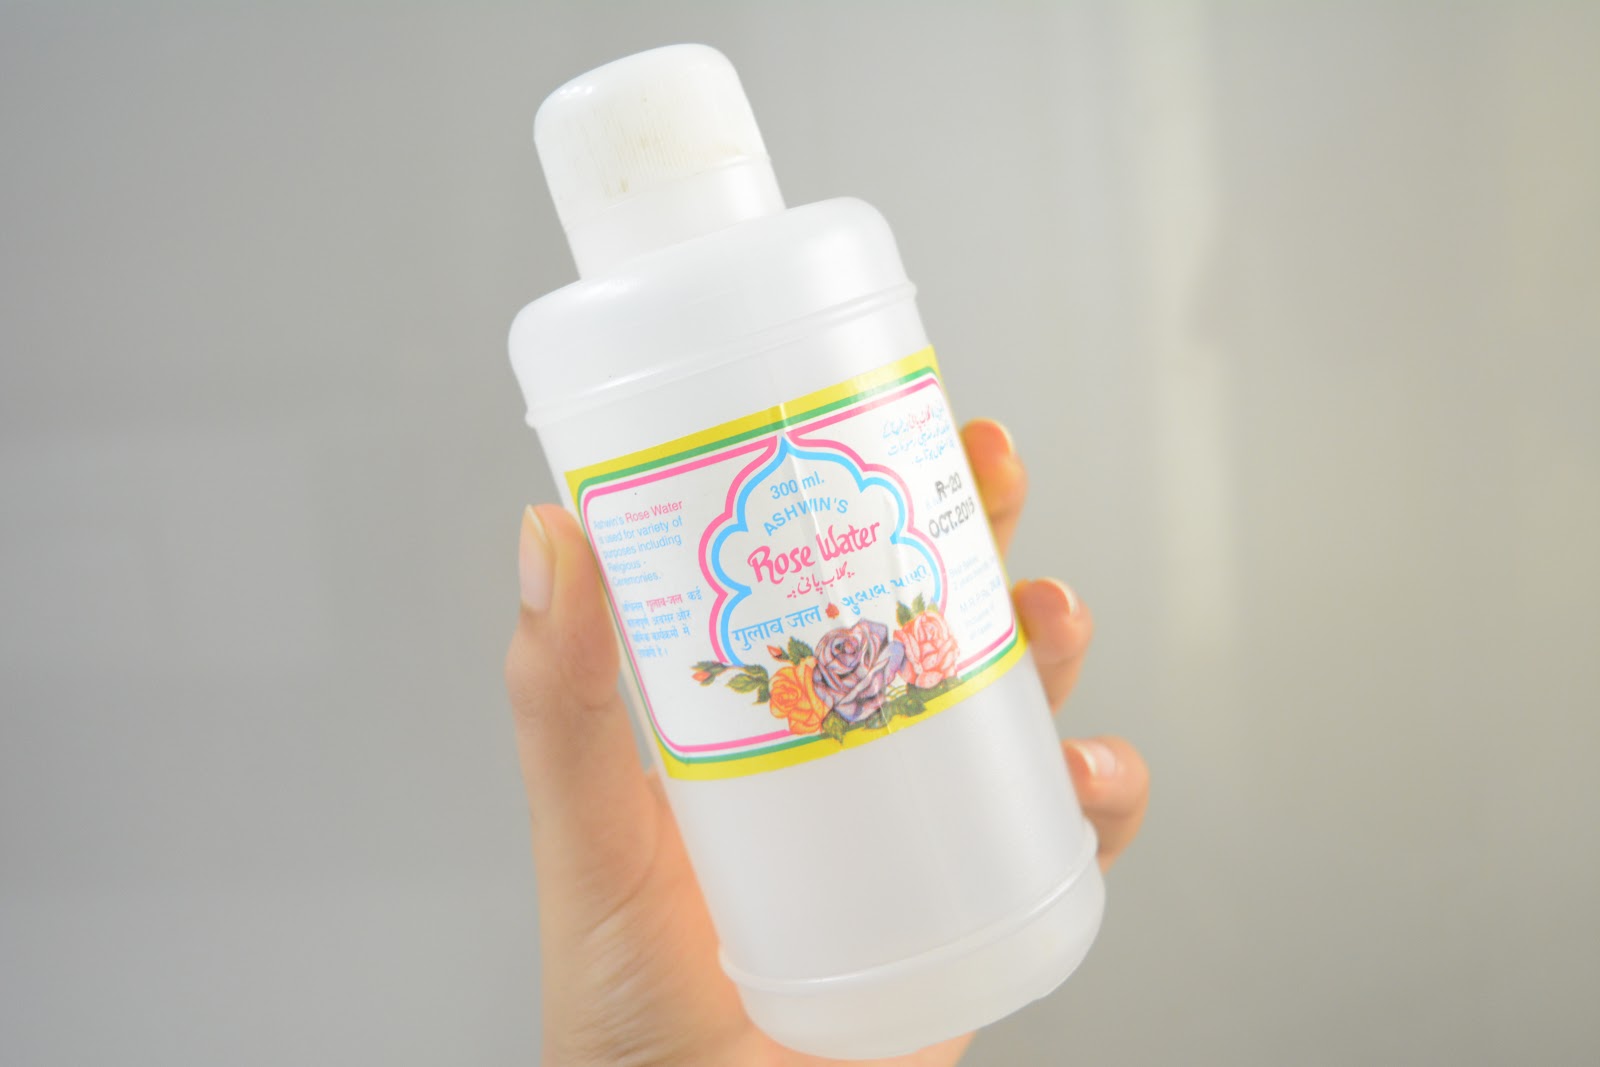
Make a rosewater face mist:

What you need:
⇒Rose water
Water 
Saffron (a spice derived from the flower of Crocus sativus)
(yes that's it)

How to make it:
Mix one part rose water with one part water in a spray bottle
Add only a few sticks of saffron (saffron has an intense orange color and you don't want to stain your face orange) to the bottle
Shake it up and spray it onto your face or use a cotton pad to apply it.

You can spray your face with this before the face pack (hydrating your skin helps it absorb the face pack better) or you can even use it generally, after washing your face, as a toner. The face mist will help your complexion and give you a nice glow.

Here's an effective face pack you can make at home using only 4 ingredients! This face pack is my all-time favorite and it makes my skin look and feel so much better every time I apply it:

What you need:

a lemonfuller's earth powder     rose water bottle

A few drops of lemon juice         Fuller's Earth (powder)                 Rose Water

Mix the ingredients together till the mixture is of this consistency (liquid enough to be able to smoothly apply on your skin but it shouldn't run off or move):

homemade face pack


face pack tested on skin


Whatever homemade face pack you make, or if you are using a store-bought face pack for the first time, swatch it on your wrist first to make sure your skin isn't allergic to any of the ingredients.

TIP: Try not to use normal moisturizers, especially ones with oils in them. Basically, only use water-based (gel) moisturizers.

lancome night cream
Don't use general creams, especially if they are for dry skin!

Be consistent with the basics like washing your face, and even occasionally doing the other things can help your skin!

Monday, August 21, 2017

PROBLEMS with the Bullet Journal! - Deal Breakers!

August 21, 2017 0
Bullet Journaling is trending and I personally have hopped on the bandwagon too. I love it because it's so easy to  customize...but is it perfect? Definitely not. I have identified a few problems over the few months that I've been using this system. Read below to find out what issues I have with the Bullet Journal system.


This post may not apply to everyone. The following issues I have with the Bullet Journal are a mix of problems with the original system and problems I have with how I make my Journal.

I have uploaded a few videos and a few posts on Bullet Journaling and if you've seen my videos are read my posts, you know I have a minimal theme with a simple 3-color palette (black, white, and gray). Check out the posts below (will open in a new tab so you don't forget about this one!)

Some problems may arise when you have a specific stylistic choice but there are also some general things that very mildly annoy me and some general things I cannot stand.
Here are 8 problems I face with the Bullet Journal system and my Bullet Journal:

1 🖉 Too neat to mess up    
I always have to keep it neat and tidy for it to be aesthetically pleasing. If not visually satisfying, I still feel the need to keep it uniform, have the same handwriting, etc. I am one of those people that don't have one single handwriting and so my handwriting changes depending on my mood, time, whether I'm lazy or not, etc. When planning in my Bullet Journal, I have to try and stick to one "font" so that it doesn't look bad. The worst part is when I make mistakes or have to cross out something and it causes my effort on that entire page (that I'd worked hard on looking beautiful) to go to waste.

2 ðŸ–‰  I can't do amazing lettering (frustration)
Sometimes I can astonish myself by writing a word beautifully when attempting hand lettering. But that's not always the case and usually, my brush doesn't want to cooperate or sometimes my hand is shaky. Seeing amazing Bullet Journal Spreads on Pinterest with flawless hand lettering and type-like fonts makes me sort of jealous because my spreads don't look that perfect! It kind of repels me from wanting to decorate and write in fancy fonts in my Bullet Journal because I can't achieve that sort of perfection yet.

3 ðŸ–‰  Can't switch up pages 
For example, if you want to change the position of a page/element to the front, you just can't. What if, when you get to your second monthly spread and then realize you wanted a TV Show tracker? You can't just add it between two monthly spreads as a stand-alone spread. That would not be called "organized". Either you have to plan your Bullet Journal properly or have to have random elements in random places in your Bullet Journal. I'm lucky if sometimes I find a way to incorporate the newly desired element into a monthly spread, but otherwise, there's nothing I can do about it other than cringe while placing a completely random element in a place it doesn't fit in.

4 ðŸ–‰  Decorating can be time-consuming
Yes, decorating is therapeutic to me most of the times. I love art and this is a perfect way to do some "light" art if that makes any sense at all. However, I don't always have time to bust out my Washi Tape Collection and spend half an hour or more decorating my journal with supplies like washi tapes, markers, watercolors, etc. It can sort of make you less productive if you spend a lot of time trying to make your page look perfect, which is the opposite of what a Bullet Journal should make you do.

5 ðŸ–‰  Can get overwhelming
Looking at the hundreds of videos online of monthly spreads, whole journal set-ups, different aesthetics, etc. can be pretty overwhelming especially if you don't know or are not very sure of how you want your BuJo to look like. There are so many elements that you can or can not add and so many ways you can position the elements and so many ways your pages can turnout. It can get overwhelming because of the variety or overwhelming because of the number of elements you want to have.

6 ðŸ–‰  Only for intense planning
If you have a week of no important tasks, you'll just end up wasting the entire daily log section for that week. Pages can be wasted when you are on holidays, have no homework/studying/errands to run, and so on.
Also, the BuJo is for intense planners. Future log, monthly spread, weekly log, daily log. You may only be able to fill up all four of those categories if you like to plan a lot and plan everything and anything. If you only like to plan a certain part of your life, and it doesn't require all those logs, the BuJo may not be for you. This type of journal is amazing and flexible. It's basically like the unicorn of planners, but it's only helpful if you fill those pages up at least partially (with actual tasks, not just the fancy headers and doodles).

7 ðŸ–‰  Page/space can be wasted (the struggle of trying to be a minimalist and efficient)
If you want to achieve a minimal-looking journal like me, you will end up facing the problem minimalism vs page wastage. Minimal doesn't necessarily have to mean spacing all your test. A minimal BuJo could be minimal in the sense of just writing words and no doodles or unnecessary distractions or minimal in the sense of appearance and spacing between elements. If it's the latter, you may not like the fact that something that could fit on one page now takes two and all the empty space could frustrate you a little, especially if you don't like the idea of wasting paper.

8 ðŸ–‰ Sometimes trying to make it look pretty results in bleed-through
Markers and all that is really in right now. I love the idea of using markers that are faded grays or pastel shades as a background for text or anything like that. The only problem is that if you don't have a good notebook (which are usually a bit more expensive) there will be ink bleeding to the other side (or worse to the next page) and that is never a pretty sight to see. If your journal has thin paper, you're restricted to using only certain pens, and hardly any markers at all.